In this article, I will show you how to repair a STL model with Netfabb. STL (Standard Triangle Language) models are widely used in additive manufacturing. However, algorithms that convert CAD models to STL format are not perfect and errors are unavoidable. The good news is that these errors can be corrected using Netfabb, which is a very robust software to repair this type of file. Another free software you can use for the same purpose is GOM Inspect.
What is Netfabb ?
Netfabb is a commercial software designed to be used for industrial and professional use. Fortunately, there is a free version for students and that is what I am using right now. It does not have all of the features you might need but most of them are there.
With Netfabb you can :
- Convert and import models from many different CAD applications.
- Create models that take advantage of additive manufacturing.
- Maximize the number of parts you can fit into each build.
What are the most common STL file defects?
Most common defects that might happen during STL conversion are:
- Holes or gaps
- stitched triangles
- Overlapping Facets
- None manifold topology
Repairing the STL using Netfabb software
After downloading and installing the software, open the STL from the file menu. You will see a popup window that asks whether you want to apply automatic repair or manual, choose manual and open the model.
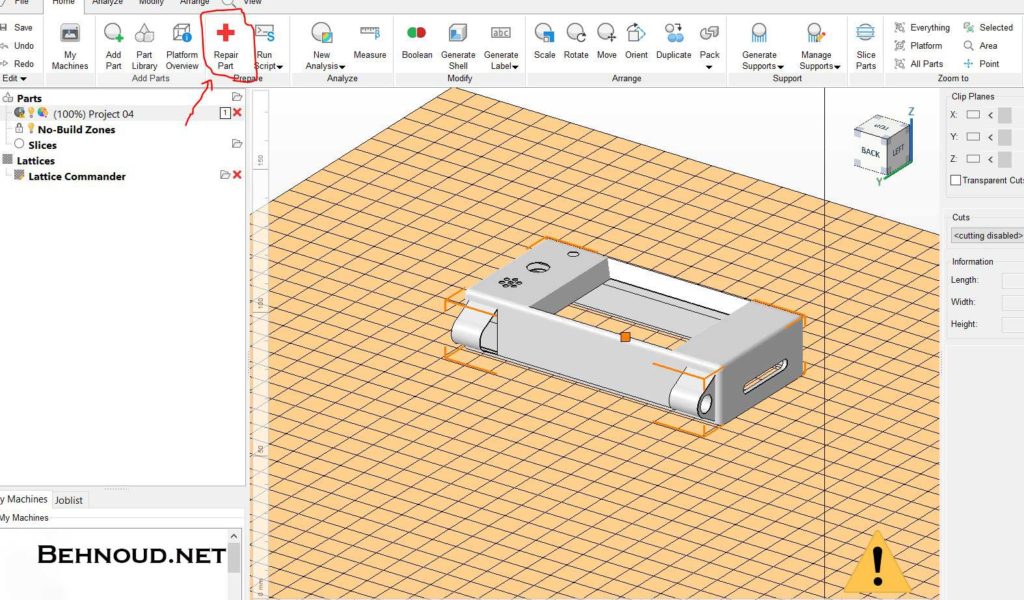
After opening the file, Choose the “Repair Model” from the upper ribbon. If the button is grayed out, the part is not selected. Click on the part and select it.
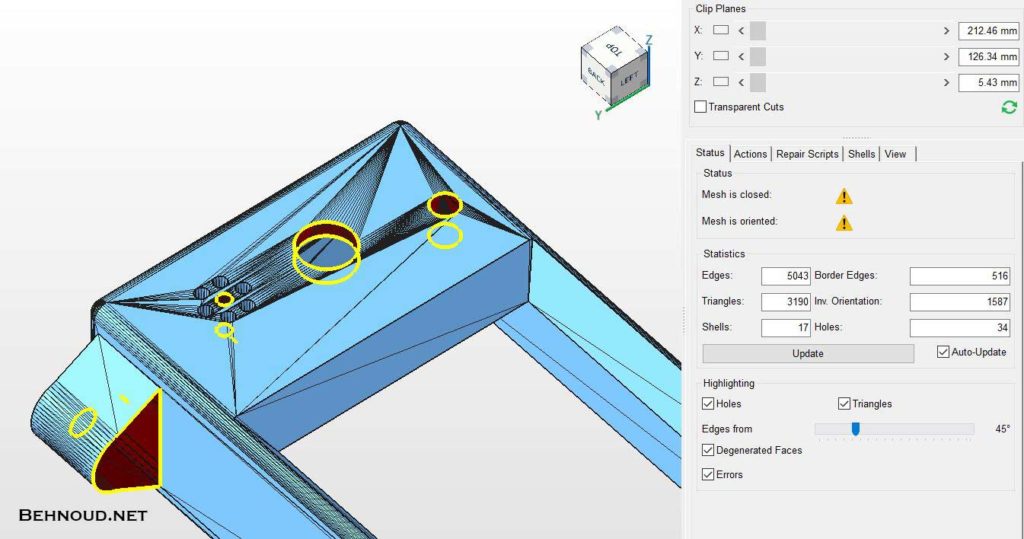
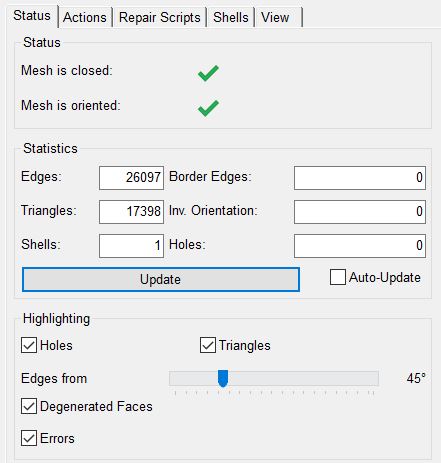
In the Repair environment, you can observe the problematic areas and also numerical values related to them. The 2 yellow triangles mean the model has some problems. We usually should have a single shell and zero holes, Border edges, and Invalid Orientations.
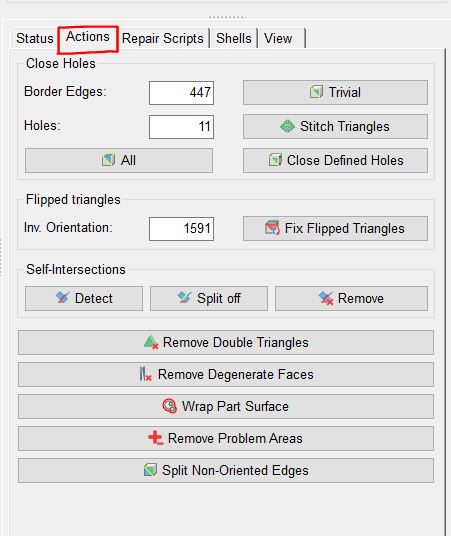
Proceed to the second tab which is Actions. For the beginning, just click “Trivial” which removes minor defects. Next, click “Stitch triangles” which is also for small defects.
Check the Status tab and you will see a reduction in numbers of problems.
Now click “Close Defined Holes”. lets see what happens for this model.
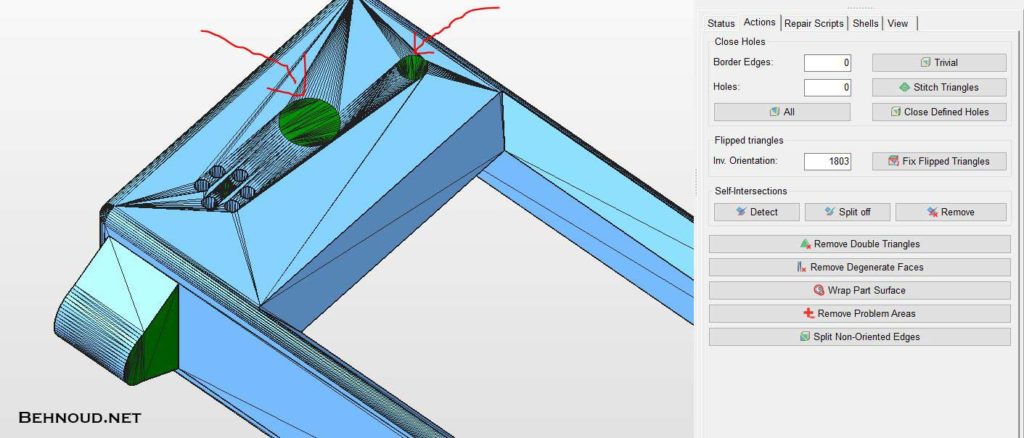
As you can see on the right, We don’t have any holes and Border edges which means the part does not have any problems. But when you look at the model itself, you will find out the holes are closed in the wrong way! here we need some manual actions! Let’s Undo the last command by pressing”crtl+Z” and go to the next step.
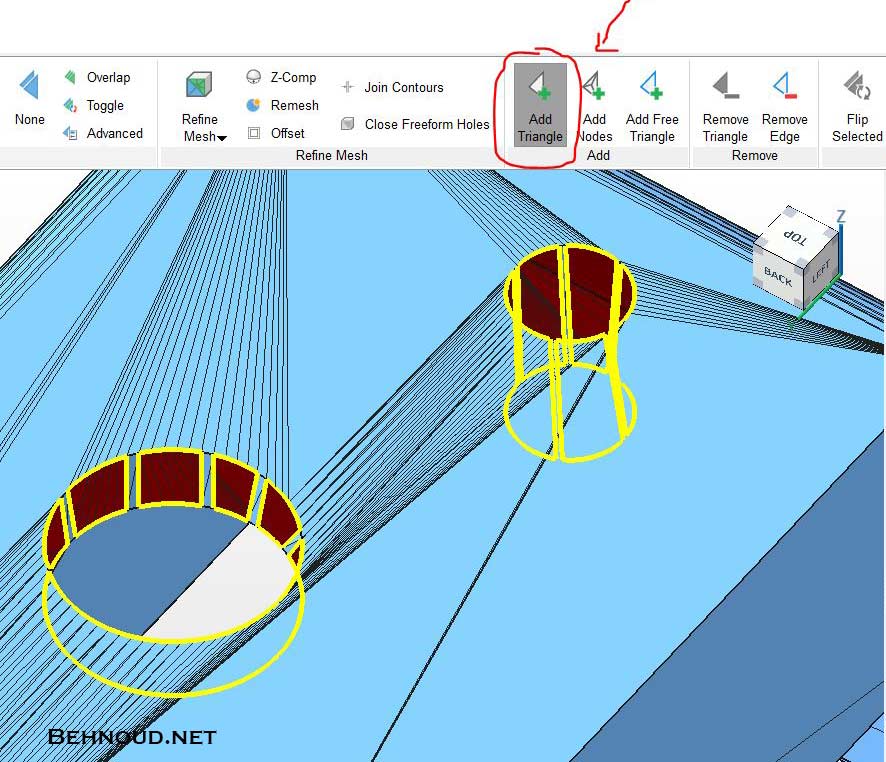
After manually adding some triangles, which will help software to understand how to close holes, you can now click on the “Close Defined holes” button.
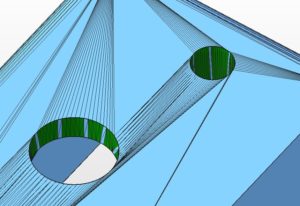
Apply the same procedure to all the holes in the model. and you will find a single shell with 2 beautiful green checkmarks in the status tab.
Finally, from the lower corner of the window click on apply repair to the STL and choose “remove Old Part”.
Congratulations! You have repaired your STL file and you can proceed to the next steps of your Additive Manufacturing process. If you want to know more about additive manufacturing steps and procedures, make sure to read my article on How additive manufacturing works.
Thanks for reading how to repair a STL model with Netfabb, I hope it helps you.
If you have any suggestions or questions please ask in the comments section below.
